You do not need to be a web developer to start a product review blog.
If you enjoy trying products, comparing them, taking photos, writing about your experience, or helping other people decide what to buy, a product review blog can turn that interest into a real online business.
You can start with a laptop, a domain name, WordPress, a simple theme, and products you already use.
You do not need to learn HTML, CSS, PHP, or JavaScript before publishing your first review.
This guide explains the whole process from zero, including how to create a WordPress blog, choose a suitable theme, publish product reviews, add product images, and use affiliate links.
Why Start a Product Review Blog?
People search online before buying almost everything.
They search for questions such as:
- Is this skincare product worth buying?
- Is this laptop good for students?
- Which coffee machine is better?
- Does this dress fit as expected?
- Is this vacuum cleaner actually useful?
- What is the difference between these two products?
- What are the pros and cons after using it for a month?
A useful product review can answer these questions from a real user’s perspective.
That creates several possible ways to build a business around a product review blog.
Affiliate income
You can join an affiliate program and receive a commission when someone purchases a product through your special affiliate link.
For example, you could write a review of a pair of running shoes and include a link to the retailer. If a reader clicks your link and makes a qualifying purchase, you may receive a commission.
The exact commission, eligibility requirements, and payment rules depend on the affiliate program.
Brand collaborations
As your website grows, companies may contact you about reviewing or featuring their products.
Some collaborations may involve free products, sponsored content, or other arrangements. Always make it clear when a post involves a commercial relationship.
Your own products and services
A review blog can eventually become a platform for other businesses too.
You might sell digital products, guides, courses, consulting, photography services, or your own physical products.
The important thing is not to think of your blog as simply a collection of product links. Build a website that people find useful and trustworthy.
Step 1: Decide What Kind of Products You Want to Review
You do not have to review everything.
In fact, starting with a specific area can make your website easier to build.
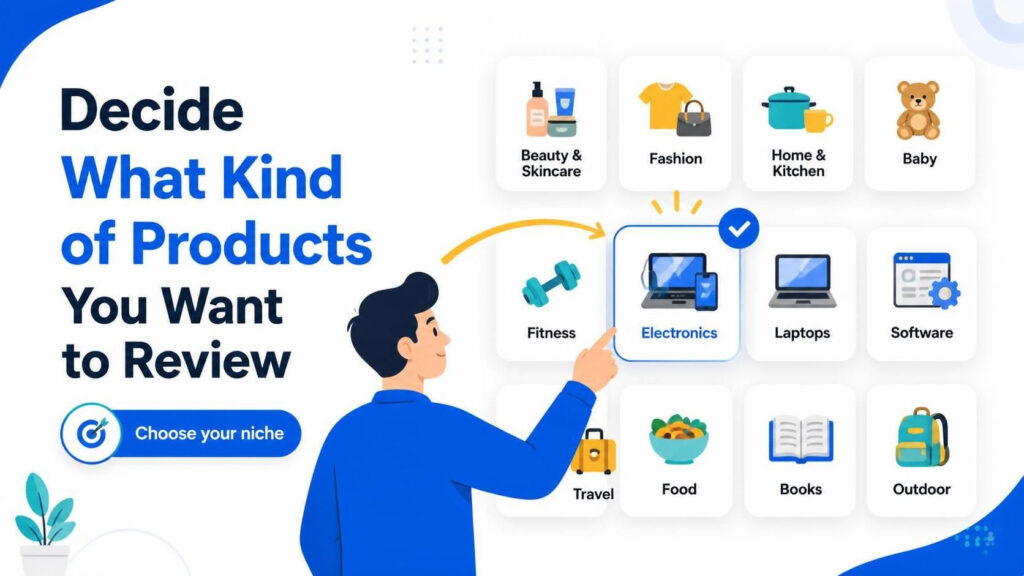
For example:
- Beauty and skincare
- Fashion and clothing
- Home and kitchen products
- Baby products
- Fitness equipment
- Consumer electronics
- Laptops and accessories
- Software and online services
- Travel products
- Food and kitchen appliances
- Books and stationery
- Outdoor and camping equipment
Choose something you genuinely enjoy learning about.
If you already buy and use products in a particular category, you have a natural starting point for your content.
You can expand into related categories later.
Step 2: Choose a Name and Buy a Domain
Your domain is the address people use to visit your website.
For example:
yourreviewblog.com
Try to choose a name that is:
- Easy to remember
- Easy to spell
- Relevant to your subject
- Not unnecessarily long
- Flexible enough to grow with your content
Avoid choosing a name that limits you to one product if you may eventually review an entire category.
For example, a name based entirely on one particular lipstick may not make sense if you later want to review skincare, fashion, and lifestyle products.
Step 3: Buy Hosting and Install WordPress
Your website needs hosting to store its files and make them available on the internet.
For beginners, using a hosting company that provides a simple WordPress installation process is much easier than trying to configure a server yourself.
I have a separate step-by-step guide showing how to create a WordPress blog on Hostinger, including registering a domain, purchasing hosting, installing WordPress, and getting the first website running.
Read: How to Create a WordPress Blog on Hostinger (Step by Step)
If you decide to use Hostinger, you can visit Hostinger here. This is an affiliate link.
You do not need to understand server administration to follow the setup process.
Once WordPress is installed, most of your everyday work will happen from the WordPress dashboard.
What Is WordPress?
WordPress is a content management system, commonly called a CMS.
In simple terms, it gives you a dashboard where you can create and manage a website without manually writing website code.
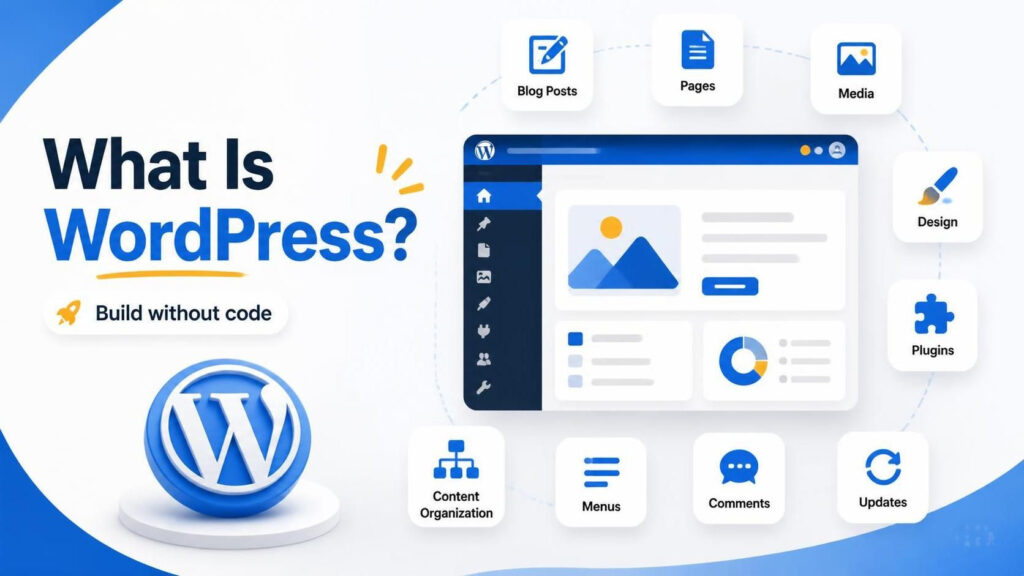
From the WordPress dashboard, you can:
- Write blog posts
- Create pages
- Upload images
- Change your website design
- Install plugins
- Organize content
- Add menus
- Manage comments
- Update your website
This is one reason WordPress is suitable for beginners who want to build a content-focused website.
If you are also considering Blogger, you can read Advantages and Disadvantages of Blogger (Blogging Platform) before choosing your platform.
Step 4: Understand the Difference Between a Post and a Page
This is one of the first things new WordPress users should understand.
What is a WordPress post?
A post is normally used for regularly published content.
Your product reviews are usually going to be posts.
For example:
- Best Running Shoes for Beginners
- My Review of a Wireless Keyboard
- 30-Day Skincare Product Test
- Laptop X Review
- Best Coffee Machines for Small Kitchens
Posts can be organized using categories and tags and displayed on your blog.
What is a WordPress page?
A page is normally used for more permanent information about your website.
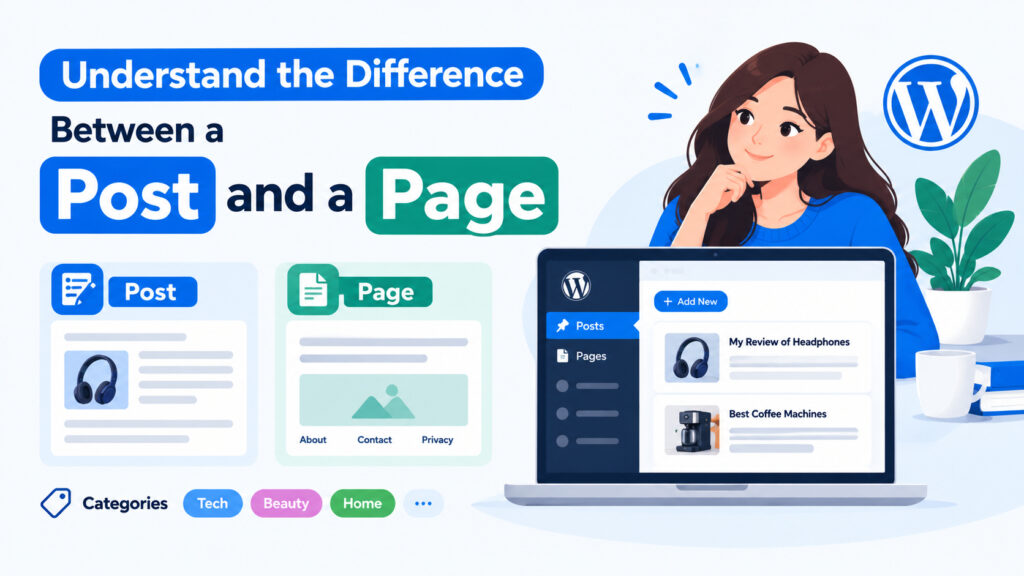
Common pages include:
- About
- Contact
- Privacy Policy
- Affiliate Disclosure
- Terms and Conditions
You can create these pages once and link to them from your navigation menu or footer.
A simple product review website might therefore have:
Posts: your individual product reviews and buying guides.
Pages: information about you and your website.
Step 5: Choose a WordPress Theme for Your Product Review Blog
A WordPress theme controls much of the visual appearance and layout of your website.
Think of it as the design and structure of your blog.
The theme affects things such as:
- Homepage layout
- Blog post layout
- Typography
- Featured images
- Navigation
- Category pages
- Sidebars
- Archives
- Mobile appearance
Choosing a suitable theme is particularly important for a product review blog because your content often needs to display product photos, specifications, scores, comparisons, and detailed opinions clearly.
You do not need to build this design yourself.
A good WordPress theme can provide the structure for you.
What Should You Look for in a Product Review Theme?
Do not choose a theme simply because its homepage looks attractive.
Look at the actual article layout too.
A suitable product review theme should make it easy to:
- Display large product images
- Write long-form reviews
- Show your personal experience
- Highlight important information
- Organize categories
- Display featured posts
- Read comfortably on mobile phones
- Navigate between related reviews
- Keep the website visually clean
You should also avoid choosing a theme that requires a complicated page builder for every small change.
For a beginner, a well-designed theme that works directly with the normal WordPress editor can make publishing much easier.
Affordable Premium WordPress Themes for Product Review Blogs
A free theme can be a perfectly reasonable way to start.
However, a professionally designed premium theme can give your website a more distinctive appearance and provide layouts specifically designed for certain types of content.

I have collected several premium WordPress themes for blogs here: 10+ Premium WordPress Themes for Blogs
Each theme includes a preview and purchase option. The themes listed in that collection are priced at $39 each.
Some are particularly suitable for product testing and review websites.
Elodie for beauty and lifestyle reviews
Elodie is designed for beauty and lifestyle bloggers.
It uses a softer author introduction, featured story overlays, and a journal-style layout.
It can work well for someone reviewing:
- Skincare
- Makeup
- Beauty products
- Fashion accessories
- Lifestyle products
Sloane for fashion and wear tests
Sloane is designed around fashion lookbooks and wear-test content.
Its layout can support information such as season, price, score, wardrobe photography, and product-focused content.
This makes it particularly interesting for fashion bloggers who want to document how products perform in real use rather than simply publishing fashion photographs.
Forge for technology reviews
Forge is designed for independent hardware and software reviews.
It includes layouts for score callouts, review information, and technology-focused content.
It can be suitable for reviewing:
- Laptops
- Keyboards
- Headphones
- Cameras
- Software
- Computer accessories
- Other technology products
Signal for technology magazines
Signal takes a broader technology magazine approach.
It can support independent reviews alongside guides, news, and other technology articles.
This may be useful if you do not want your website to be only a review site and eventually want to publish technology-related content around your reviews.
Larder for food reviews and recipe content
Larder is designed for food blogs and recipe journals.
Its layout focuses on information such as servings, time, and season.
It can be useful for food bloggers who want to combine recipes with product testing, kitchen equipment reviews, and food-related content.
You can see the complete collection and compare the available designs in 10+ Premium WordPress Themes for Blogs.
Step 6: Install WordPress Plugins You Actually Need
Plugins add functionality to WordPress.
You do not need to install dozens of plugins.
Too many unnecessary plugins can make website management more complicated.
For a new product review blog, consider the following categories:
SEO plugin
Recommended.
An SEO plugin can help you manage important search engine settings and make basic SEO work easier.
Analytics and Search Console
Optional, but useful.
Analytics can help you understand where visitors come from and which content they read.
Google Search Console can help you understand how your pages appear in Google Search.
Security plugin
Recommended.
A security plugin can provide additional protection and security-related features.
Backup and restore plugin
Recommended.
Do not wait until something goes wrong before thinking about backups.
A reliable backup system gives you a way to restore your website if something goes wrong.
Contact form plugin
Optional.
Useful if you want readers, companies, or potential partners to contact you through your website.
Caching and performance plugin
Recommended.
A caching and performance plugin can help improve website loading performance when configured correctly.
Image optimization plugin
Optional.
Product review websites often contain many photographs, so image optimization can be useful for reducing unnecessarily large image files.
HTTPS helpers
Optional.
Most modern WordPress hosting setups provide HTTPS, but you may still encounter configuration issues depending on your hosting environment.
Antispam for comments
Optional.
If you allow comments, an antispam solution can help reduce unwanted submissions.
For a more detailed list of useful plugins for a new WordPress website, see: Must-Have WordPress Plugins for New Blogs
Start with what you actually need. You can always add another plugin later.
Step 7: Create the Important Pages
Before publishing dozens of reviews, create the basic pages your website needs.
At minimum, consider:
About page
Tell readers who you are, what you review, and what they can expect from your website.
You do not need a corporate biography.
A simple explanation of your interests and review approach can be more useful.
Contact page
Give readers and companies a way to contact you.
Privacy Policy
Explain how your website handles visitor information.
Affiliate disclosure
If you use affiliate links, clearly disclose your affiliate relationships.
Do not hide the fact that you may earn a commission from qualifying purchases.
Step 8: Publish Your First Product Review
Now comes the most important part.
Write your first review.
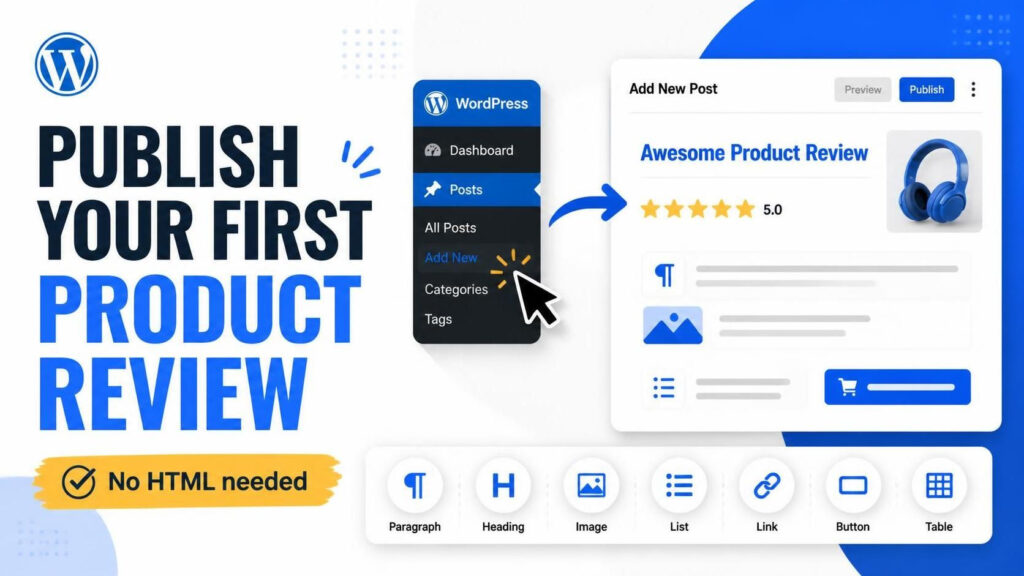
You can do this from the WordPress dashboard by going to:
Posts > Add New
WordPress will open the post editor.
You can then enter your title and start writing.
You do not need to write HTML.
The WordPress editor lets you add paragraphs, headings, images, lists, links, buttons, tables, and other content using blocks.
A Simple Product Review Structure
You do not need to copy the same format for every product, but a structure like this can make your reviews easier to read.
Product name and introduction
Explain what the product is and who might be interested in it.
Your testing experience
Explain what you actually did with the product.
For example:
- How long you used it
- Where you used it
- What you tested
- What worked well
- What did not work well
This is where your personal experience becomes valuable.
Important features
Explain the features that matter to a potential buyer.
Do not simply copy the manufacturer’s product description.
Explain why a feature matters.
Pros and cons
Give readers a quick summary.
Pros
- Easy to use
- Comfortable design
- Good battery life
Cons
- Expensive
- Limited color choices
Who is it for?
Explain which type of person may find the product useful.
Who should skip it?
This can be just as helpful as explaining who should buy it.
Final thoughts
Summarize your experience and the main reasons someone might consider or avoid the product.
Step 9: Add Product Images
Product reviews are much easier to understand when readers can see the product.
You can add an image directly inside the WordPress editor.
In the post editor, click the + button and choose Image.
You can then upload an image from your computer or select an image from your WordPress Media Library.
For products you personally test, your own photographs can make your review much more useful.
You can photograph:
- The product
- Packaging
- Product details
- Size comparison
- How you use it
- Different angles
- Results after testing
Try to use clear, appropriately sized images rather than uploading unnecessarily huge files.
Also add descriptive alternative text where appropriate.
Step 10: Add Affiliate Links
Once you join an affiliate program, you may receive a special URL for a product.
You can add that URL to your WordPress post.
For example, you might write:
Check the current price
Select the text, click the link option in the WordPress editor, and paste your affiliate URL.
You can also link product names, buttons, images, or other appropriate elements.
Do not fill every paragraph with affiliate links.
A review should first help the reader.
Place links where they make sense.
For example:
After testing the headphones for several weeks, I found the comfort particularly useful for long work sessions. You can check the current price here.
Then link “check the current price” to your affiliate URL.
Remember that affiliate programs have their own terms and disclosure requirements. Read and follow the rules of each program you join.
Step 11: Organize Your Reviews
As you publish more content, organization becomes important.
You might create categories such as:
- Beauty
- Fashion
- Technology
- Home
- Kitchen
- Fitness
- Software
Then place each review into the appropriate category.
You can also use tags when they genuinely help organize related content.
Do not create dozens of nearly identical categories.
Keep your navigation simple enough for a new visitor to understand.
Step 12: Publish Helpful Content Beyond Individual Reviews
A successful product review website does not have to publish only individual product reviews.
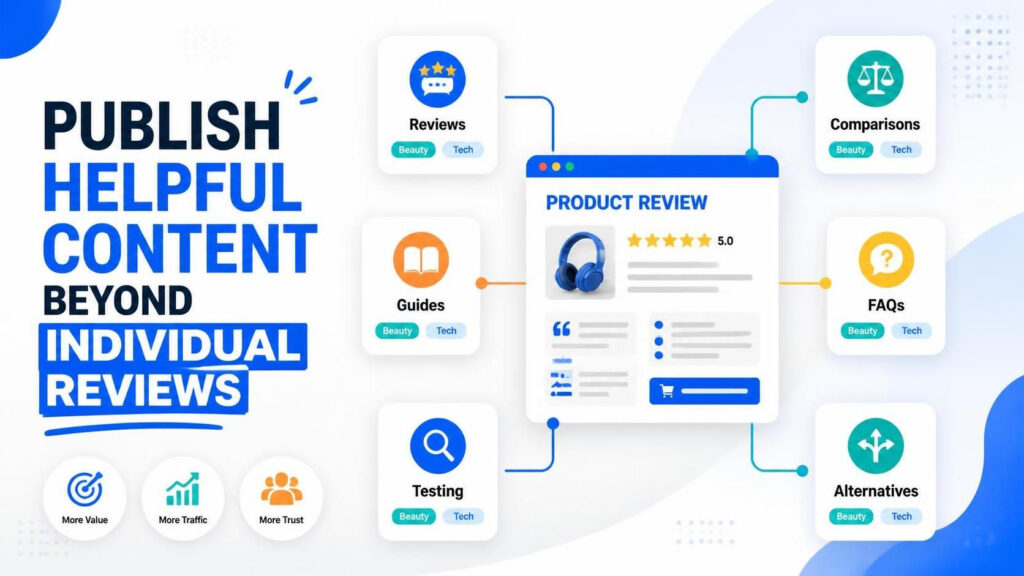
You can create several types of content around the same topic.
For example, if you review beauty products, you might publish:
- Product reviews
- Product comparisons
- Best products for beginners
- How-to guides
- Product testing results
- Buying guides
- Alternatives
- Frequently asked questions
If you review technology, you might publish:
- Laptop reviews
- Headphone reviews
- Product comparisons
- Setup guides
- Buying guides
- Accessories worth considering
- Long-term testing reports
This gives readers more reasons to visit your website.
Step 13: Build Trust With Honest Reviews
Your biggest asset is not the affiliate link.
It is trust.
If every product is described as “amazing”, readers will eventually stop believing your reviews.
Explain both strengths and weaknesses.
If a product has a problem, say so.
If you have only tested a product for one week, do not present the experience as a six-month long-term test.
If you received the product for free, disclose that relationship.
The goal should be to provide information that helps readers make their own purchasing decisions.
You Do Not Need to Be a Programmer
This is worth repeating.
You can start a product review blog without knowing:
- HTML
- CSS
- PHP
- JavaScript
- SQL
- Server administration
WordPress handles much of the technical work.
Your main skills will be different:
- Finding useful products to review
- Testing them carefully
- Taking useful photographs
- Writing clearly
- Understanding your readers
- Learning basic SEO
- Publishing consistently
- Building trust
You can learn the technical parts gradually as your website grows.
A Simple Product Review Blog Roadmap
If you are starting from absolutely zero, follow this order:
1. Choose a product category
Decide what you want to review.
2. Choose a domain name
Pick a memorable website name.
3. Purchase hosting and domain
Set up your WordPress hosting.
4. Install WordPress
Complete the basic WordPress installation.
5. Choose a theme
Select a design suitable for your type of reviews.
6. Create essential pages
Create About, Contact, Privacy Policy, and Affiliate Disclosure pages.
7. Install essential plugins
Start with SEO, security, backup, and performance tools.
8. Customize your website
Add your site title, logo if you have one, menu, categories, and basic branding.
9. Write your first review
Test a product and document your experience.
10. Add photographs
Upload useful product images.
11. Add affiliate links
Join relevant affiliate programs and add links where appropriate.
12. Publish
Review the article, check the links and images, then publish it.
13. Keep creating useful content
Publish more reviews, comparisons, and helpful guides around your chosen topic.
What Your First Month Can Look Like
Do not worry about publishing 100 articles immediately.
A simple first month could look like this:
Week 1: Set up your domain, hosting, WordPress, theme, and essential pages.
Week 2: Publish your first two or three product reviews.
Week 3: Publish a comparison or buying guide and improve your existing reviews.
Week 4: Continue publishing, learn basic SEO, check your search performance, and improve the website based on what readers need.
The exact number of posts is less important than creating genuinely useful content.
Start Small and Improve as You Go
You do not need a perfect website before publishing your first review.
You need a working website, a clear topic, a product you can genuinely test, and the willingness to learn.
Start with one category.
Review products you can realistically access.
Take your own photographs when possible.
Explain what you actually experienced.
Make your affiliate relationships clear.
Then improve the website one step at a time.
If you want to build your WordPress website but get stuck during setup, theme installation, or customization, you can contact me through COMPROMATH. I am available to help you set up your product review blog.
The technical side can be learned.
The more important part is starting with something useful to say and giving readers a reason to trust your experience.
