How To Create A Blog in Google Blogger Step By Step
Starting a blog can change you and your goals. To begin, you should create a blog and many platforms provide creating blog.
Google Blogger is one of them popular platform. But before you make a professional blog on Blogger, let’s grab some basics.
Why blog? Why is blogging important? Here are some reasons why you should blog:
- Promote Yourself: Blogging is a popular way to promote yourself and your business.
- Blogging for Business: It’s the best way to promote your business, get ideas from clients, discuss client satisfaction, and understand what clients expect from your products and services.
- Escape Bad Habits or Addictions: If you have unhealthy habits, blogging can divert your attention away from them. Starting a blog on a topic you enjoy can make you happy, and you might stick with it.
- Build a Better Career: If you love writing and want to become a freelance writer, blogging can help you build your skills and connect with clients looking for good writers. This applies to other creative pursuits as well.
- Earn More Income: Blogging is a great way to make money online. You can display ads, do affiliate marketing, or sell your products like ebooks, web templates, or themes.
- Develop Skills and Stay Updated: Blogging makes you more skilled and keeps you updated. It encourages practice and introduces you to the latest trends and technologies. Being curious and eager to learn is important.
- Share, Learn, and Join a Community: Sharing what you’ve learned through your blog creates a community where you can discuss topics and receive valuable feedback.
There are many reasons to start blogging, but I blog for my soul, for my passion. It brings me joy, just as I hope it will for you.
So, go ahead and start blogging.
What is Blogger (Google) & Its Benefits?
Blogger is a free blogging platform powered by Google. It provides free storage and content management system to publish blog post including images, videos.
It also provide free subdomain that ends with .blogspot.com.
Example: compromath.blogspot.com
Here compromath is your blog name and the whole subdomain compromath.blogspot.com is the complete address which through your readers can explore your blog from web browser. You can also remove ‘blogspot’ extra name from your blog address and for that you must purchase or register custom domain from Domain providers. They charge small amount yearly.
Blogger also provides free SSL that ensures secured data encryption of every operation in your blog.
If your blog address starts with HTTPS:// then it means your blog has SSL installed.
Beside Blogger’s benefits, it has some drawbacks .
8 Steps to Create a Blog on Blogger
The following step-by-step guide help you to create your blog on Blogger platform easily:
Create Account in Blogger
If you don’t have Google Account, first create it with your phone number and personal information.
Then visit BLOGGER.COM .
Choose Blog Name & Blog Address
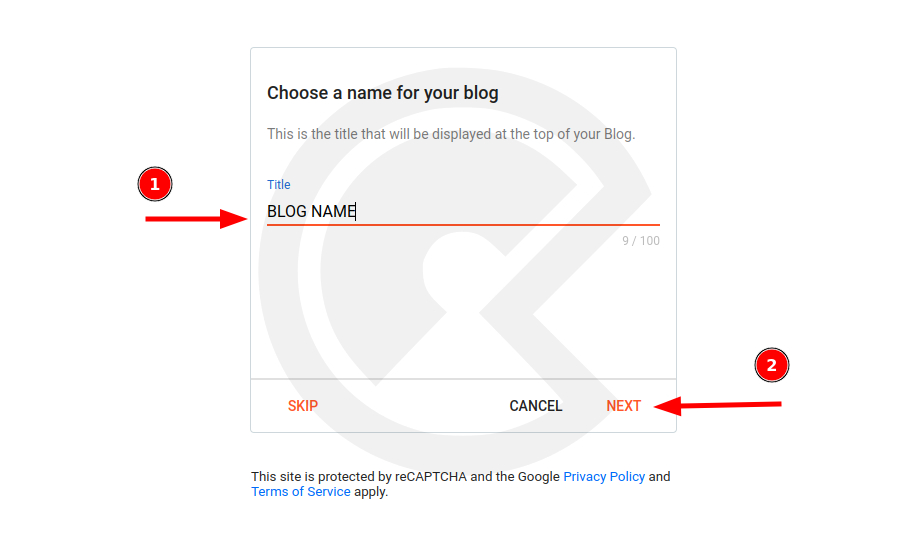
- Put your blog name.
- Click Next .
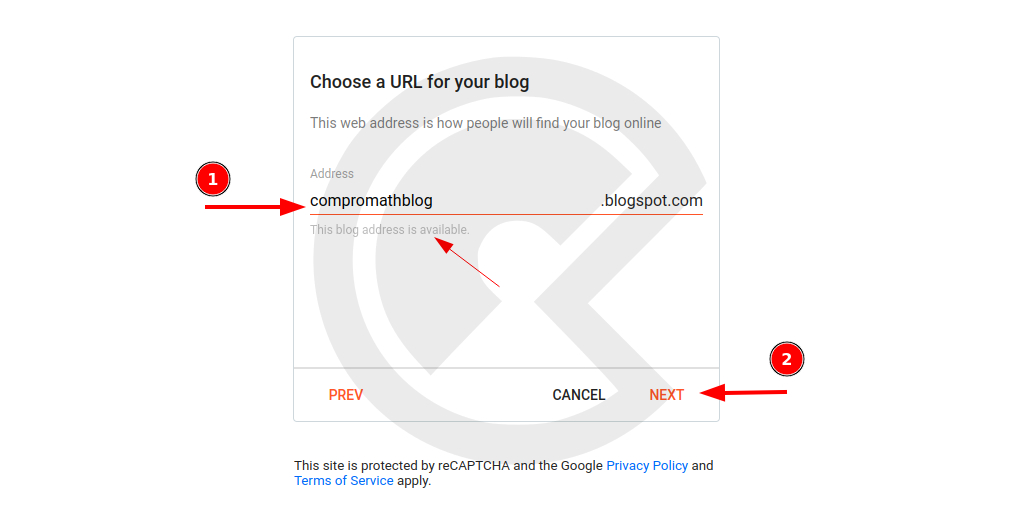
- Now put blog address name. If it shows warning: Sorry, this blog address is not available, that means it is not available, you must change your blog address name. Then you will see warning: This blog address is available.
- Click Next.
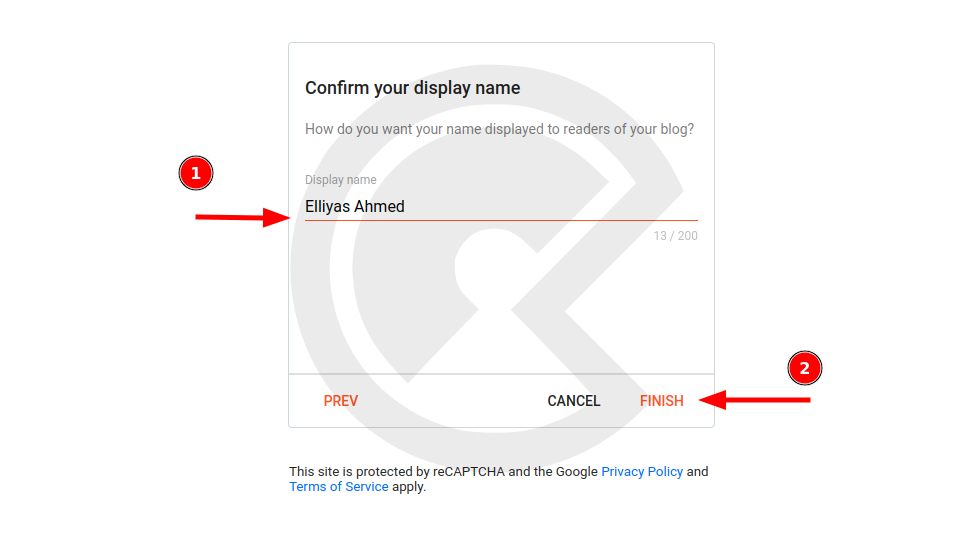
- Confirm Your Display Name: Write here your name that you want to display at your blog.
- Click Finish.
Congrats! Your blog has been created successfully. Now follow the next steps.
Choose Blogger Theme
Blogger Theme (was known also Template) is the front design and layout how your blog should look at. Background Color, Typography, Elements Color etc are included to theme.
Blogger provides FREE 21 Modern & Clean Themes and 32 Classic Themes.
The first 21 are modern and the remaining are classic with older version.
Contempo Light is the default installed Blogger Theme.
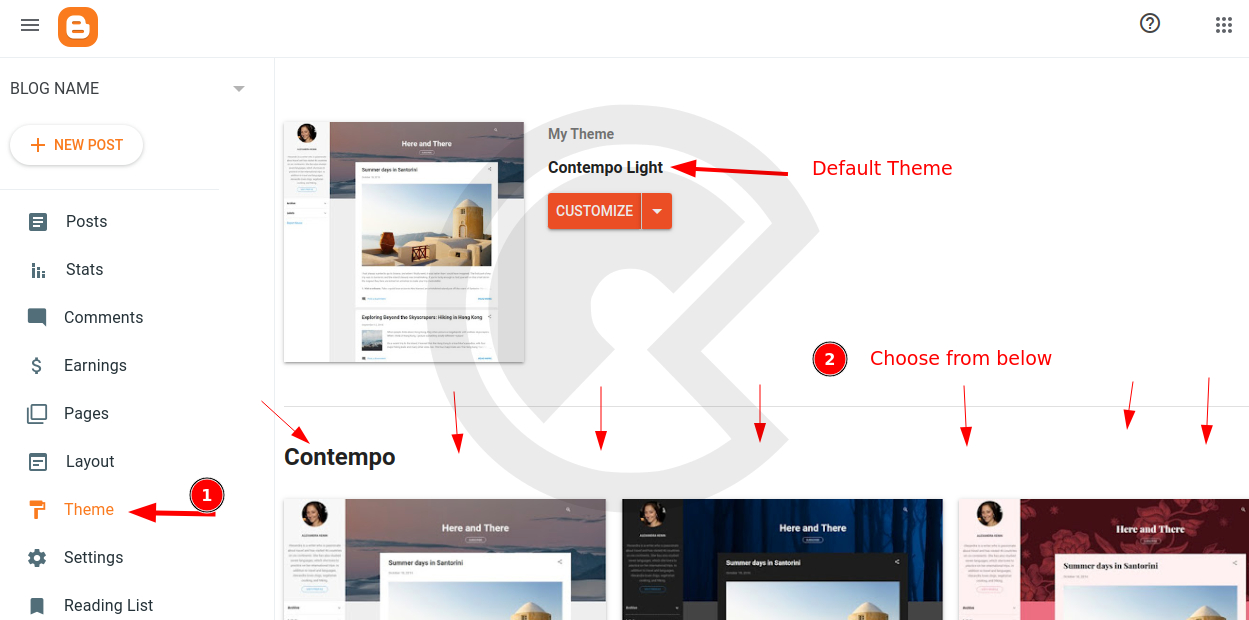
If you want to change current Blogger Theme, go to Blogger Dashboard → Theme. You will get here all free available Theme.
Choose and Apply!
Customization: Color, Typography
Now lets customize blog colors and typography. This is amazing feature that let you to choose your preferred colors, font family, style font size etc.
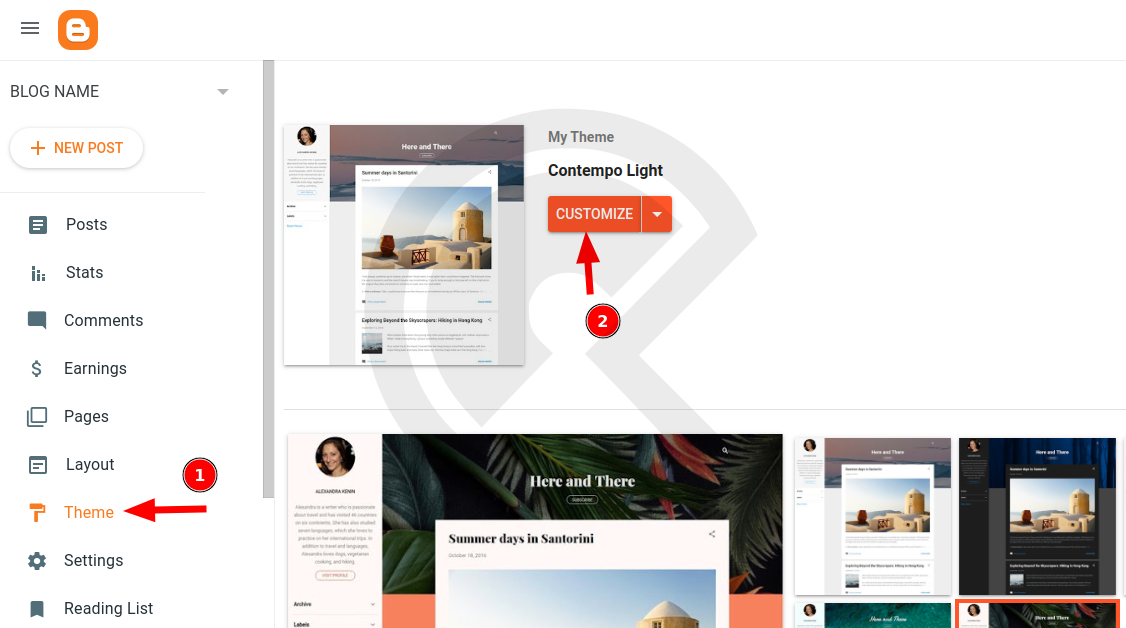
- Go to Blogger Dashboard → Theme & Click on Customize.
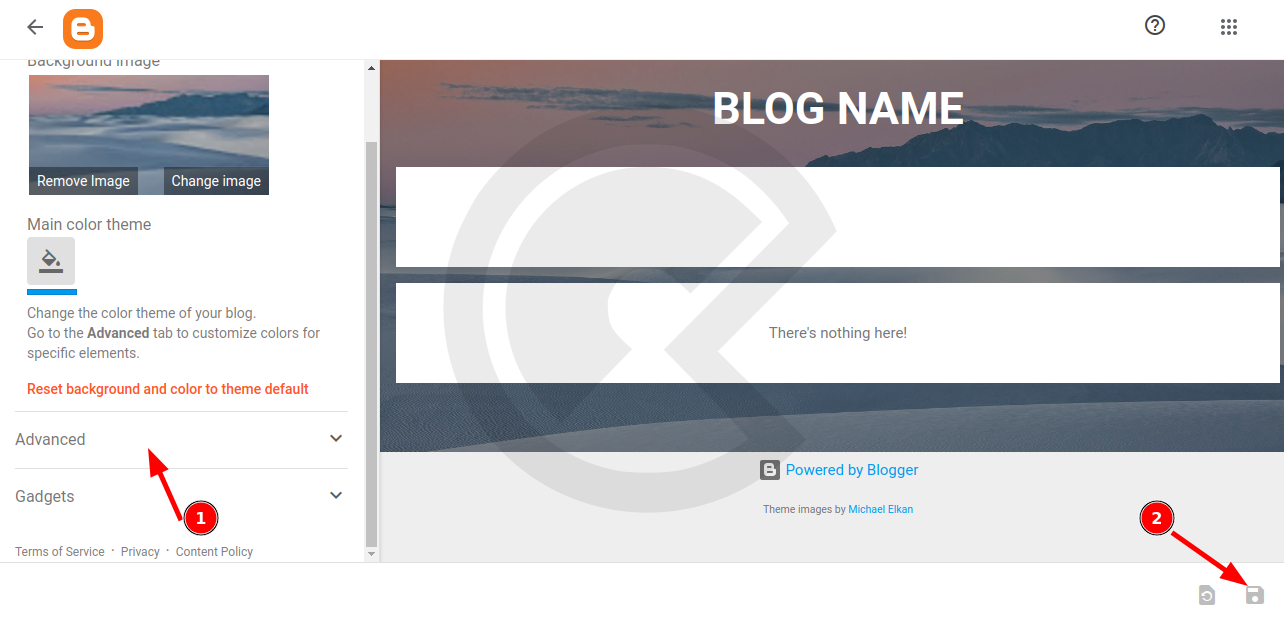
- You will get option Advanced. Click on it. In this section, you will get all features to customize. Just update according to your preferences. If you want to rollback, click on Default.
- After customization, to save, click on Save icon.
Awesome! You have painted your blog with your dream!
Set Custom Domain
It is not mandatory to purchase custom domain but recommended. Even you can run your blog without custom domain.
But if you are serious about blogging and want to start blogging as career, then I highly recommend to purchase custom domain.
Where will your purchase domain for Blogger? According my experience, I recommend two domain providers for Blogger platform:
- Google Domain and,
- Namecheap
Setting domain through Google Domain is super easy! Just select and purchase domain and connect to your Blogger account. That’s it !
And for Namecheap, you need to follow instructions step by step – How to connect Namecheap Domain to Blogger .
Install Free SSL
As I told, Blogger provides free SSL that ensures secured data encryption of every operation in your blog.
If your blog address starts with HTTPS:// then it means your blog has SSL installed.
With blogspot subdomain, now SSL is installed by default. You don’t need to install it again.
But if you set custom domain but not install SSL, then you must follow the followings –
- To install free SSL, go to Blogger Dashboard → Settings
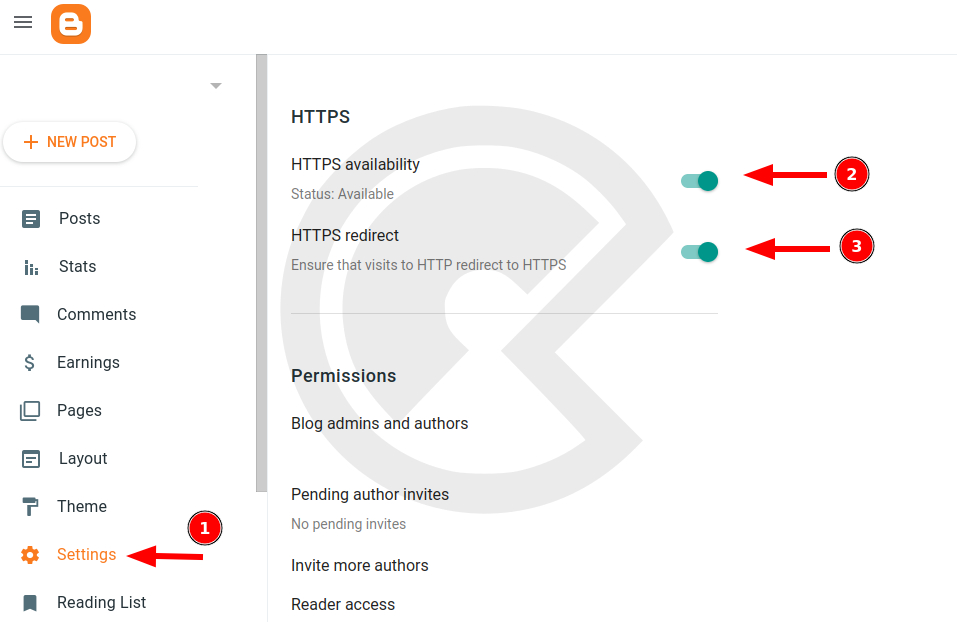
- Under HTTPS section, switch on both HTTPS availability, HTTPS redirect and nothing to do.
- It will take few times and will setup automatically.
Basic Blog Settings
After completing the above tasks, you can consider the following basic blog settings from Blogger Dashboard → Settings to make your blog more productive:
- Title: Updated your blog Title
- Description: Describe about your blog
- Favicon: Upload a favicon (icon of your blog)
- Meta Tags: SEO Meta tags for your blog
- etc.
Though Google Blogger provides its free platform for blogging, now it has been using to built multi purpose website like personal portfolio. business website, wedding website, travelling blog, photography, book portfolio etc.
Still thinking? Read this article – if you want start blogging on WordPress .
# Written by Elliyas Ahmed


