How to Connect and Use an External Monitor with Your Steam Deck
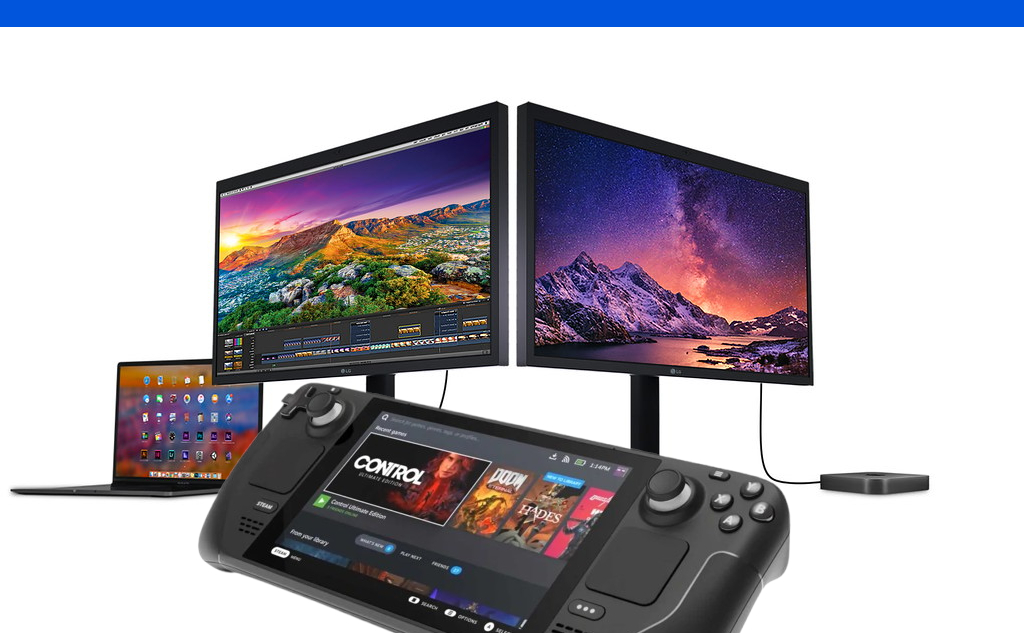
Connecting your Steam Deck to an external monitor can enhance your gaming and productivity experience, allowing you to enjoy games or multitask on a larger screen.
This guide will walk you through the steps to set up your Steam Deck with an external display for seamless performance.

Why Connect a Steam Deck to an External Monitor?
Using an external monitor with your Steam Deck offers numerous benefits. You can enjoy better visibility for intense gaming sessions, higher resolutions, or multitask efficiently by connecting peripherals like a keyboard and mouse. This setup transforms your Steam Deck into a mini-PC, ideal for gaming, streaming, or work-related tasks.
What You’ll Need to Get Started
Before setting up, ensure you have the following essentials:
- Steam Deck: Ensure it’s updated to the latest firmware.
- External Monitor: Any monitor with HDMI, DisplayPort, or USB-C input.
- Docking Station or USB-C Hub: A dock with HDMI/DisplayPort output and charging passthrough.
- HDMI or DisplayPort Cable: Depending on your monitor’s input.
- Power Adapter: To keep your Steam Deck charged while connected.
Steps to Connect Your Steam Deck to an External Monitor
- Set Up the Dock or USB-C Hub
Place your docking station or USB-C hub near the external monitor. Connect the hub to your monitor using an HDMI or DisplayPort cable. Ensure the dock is powered if it has a power input. - Connect the Steam Deck
Plug your Steam Deck into the dock or hub via its USB-C port. The monitor should automatically detect the Steam Deck as a source. If it doesn’t, manually select the correct input on your monitor. - Adjust Display Settings
On your Steam Deck, navigate to Settings > Display. Here, you can adjust resolution, refresh rate, and display scaling for the external monitor to optimize the experience. - Connect Peripherals
Enhance the setup by connecting a mouse, keyboard, or game controller to the USB ports on the dock. This creates a more comfortable desktop-like environment. - Enjoy Your New Setup
Launch games or applications and enjoy the improved screen real estate and resolution. You can also use this setup for productivity tasks by accessing desktop mode on the Steam Deck.
Read also – How to Stream Xbox Games to Your Steam Deck
Optimizing Performance for External Monitor Use
To get the most out of your external monitor setup, follow these tips:
- Use a High-Quality Cable: A reliable HDMI or DisplayPort cable ensures stable performance without flickering or interruptions.
- Enable High-Performance Mode: In the Steam Deck’s settings, enable high-performance mode for smoother gameplay on higher resolutions.
- Keep Your Deck Charged: Connecting to an external monitor can drain the battery quickly. Use a powered dock or USB-C hub to keep the device charged.
- Update Drivers: Regularly update your Steam Deck’s software to maintain compatibility with external devices.
Final Thoughts
Connecting your Steam Deck to an external monitor unlocks its full potential, turning it into a versatile device for gaming, streaming, and productivity. Whether you’re playing graphically intensive games or working on a larger screen, this setup ensures a smooth experience.
With the right tools and settings, the Steam Deck becomes a powerhouse for gaming and beyond. Follow this guide to enjoy your favorite games and tasks on the big screen. If you’re a Steam Deck owner looking for flexibility, setting up an external monitor is a must-try upgrade.
# Written by Elliyas Ahmed


