How To Edit Blogger Template XML Tutorial Step-By-Step Guide
To change the design of Bloggers (blogspot) look, you need to edit its theme or template for including additional or customized HTML, CSS, JavaScript codes. Before editing HTML or XML you should be conscious of the backup of your current installed XML Theme or Template. Otherwise, you may lose previous design or codes to reuse, since there have limitation steps to go previous (undo) format by Ctrl + Z or forward/redo by Ctrl + Y
Complete Guide to edit Blogger XML Template
First, we will see how to backup Blogger/Blogspot theme.
Backup Blogger XML
Your current installed theme is the most important and valuable property of your blog or website. The negligence to backup may bring out big harms such as losing valuable data or codes. If you backup Blogger XML to your Computer directory, you can upload anytime when you need to restore your previous theme.
STEP-1: Go to Blogger Dashboard, Choose Theme option and you will see like below.
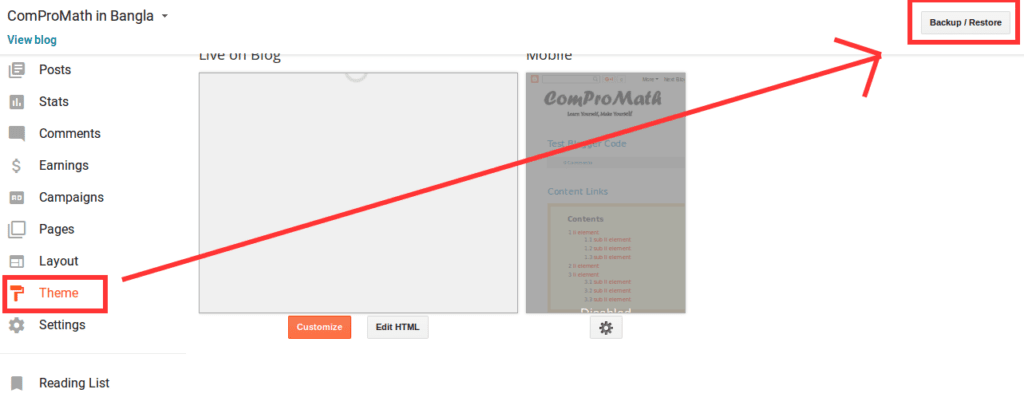
Choose ‘Backup/Restore’ option according to the figure. You will see a pop-up window.
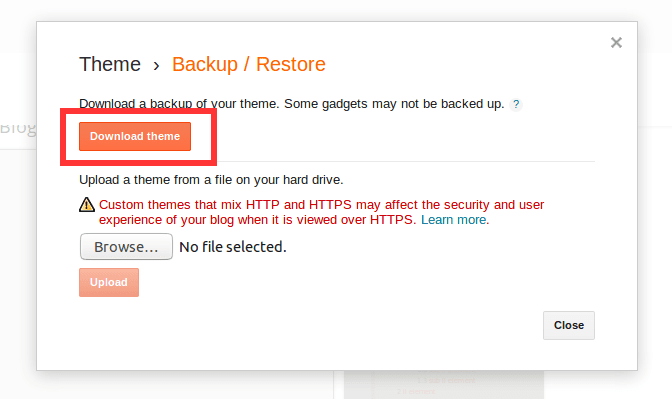
STEP-2: Click on Download option from the pop-up window. Then another Pop-up will be landed you to the previous window as below.
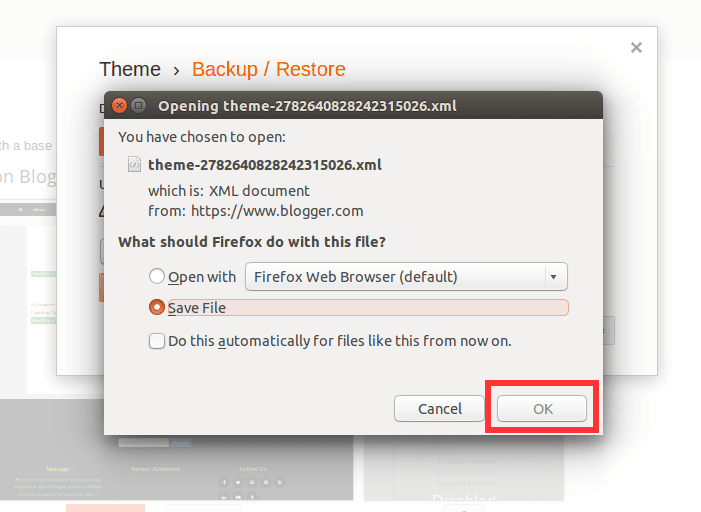
Check on Save File button and OK.
STEP-3: Next you will be redirected to your Computer directory. Choose your directory to save your Backup Blogger Theme. You can rename this theme.
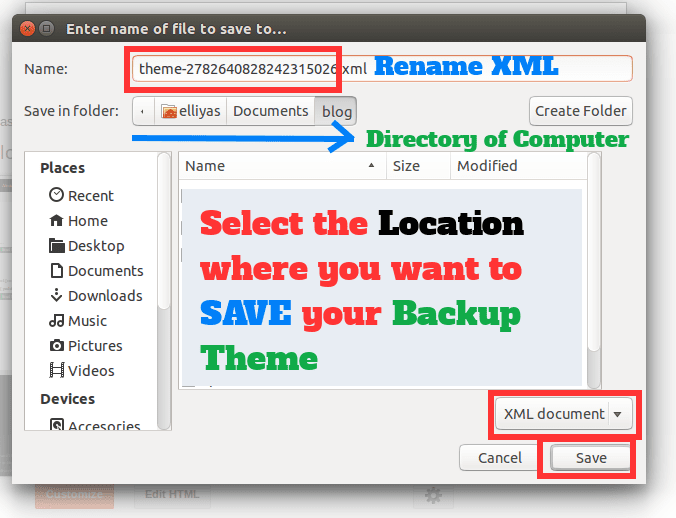
After renaming save the downloaded theme with XML extension.
Install/Upload Blogger XML Theme
To change or restore any Blogger XML Theme, we need to upload the selected theme to install. We can select our previous backup theme or free or premium Blogger Theme as we want.
How to Install Blogger Template:
For installing any Blogger Theme you must follow the below steps.
STEP-1: Go to Blogger Dashboard, Choose Theme option. Choose ‘Backup/Restore’ option according to the figure. You will see a pop-up window.
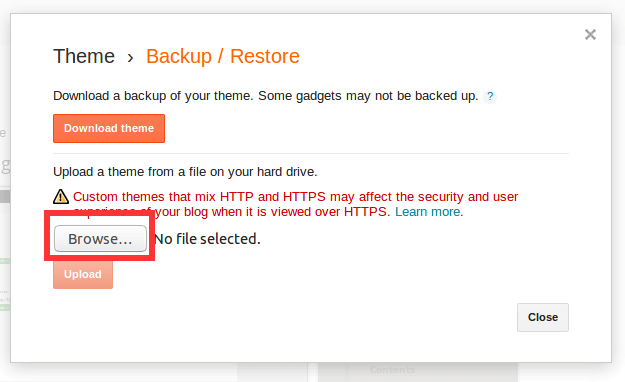
STEP-2: Click on ‘Browse’ option to upload Blogger XML File as following the figure.
STEP-3: Next you will be redirected to your Computer directory. Find the directory where you have saved or download Blogger Theme to install. After getting select the Blogger XML file and ‘Open‘.
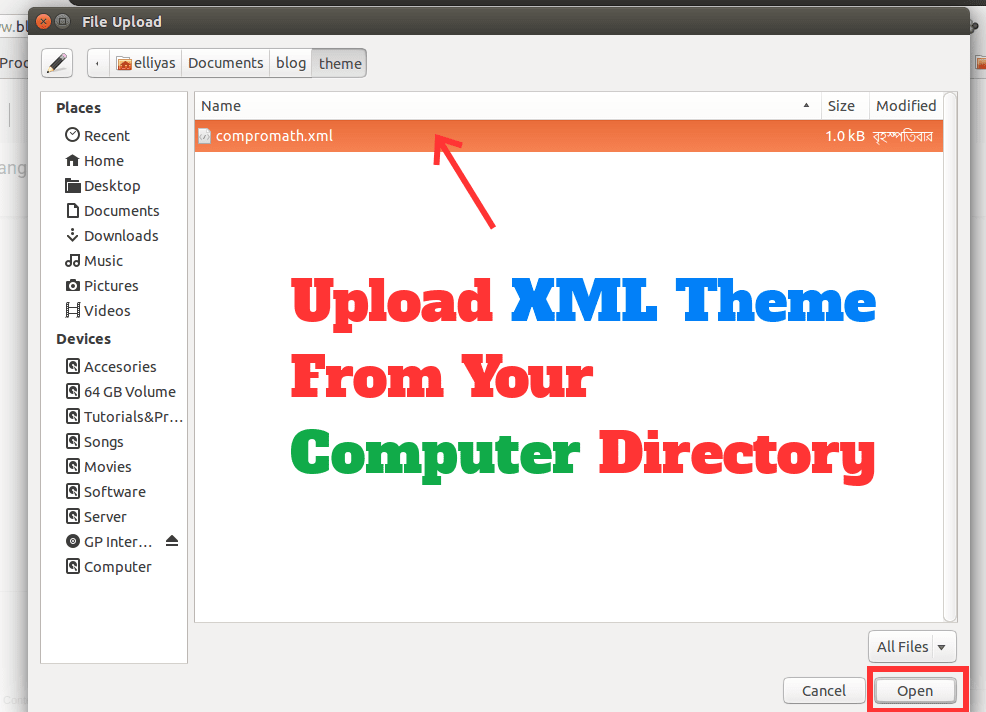
If you open properly you will see the name of your Blogger Theme beside ‘Browse’ option.
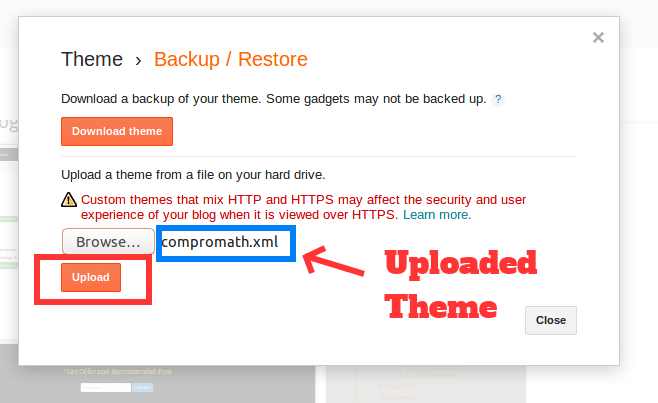
STEP-4: After opening you are able to upload your selected theme to your Blog or Website. Click on ‘Upload’ option and wait a few time to upload successfully.
Edit Blogger HTML & XML
Editing Blogger or Blogspot Theme or Template is advanced level for a Blogger (Who blogs). Before starting you must have the basic concept of HTML, CSS, JavaScript, Inspect Element from Browser.
If you want to
- Add or remove codes,
- Minify or beautify,
- Design etc.
you have to edit Blogger HTML & XML.
You can edit on Blogger HTML Editor or on your Desktop HTML editor like Dreamweaver, Sublime Text, Notepad++, Gedit etc. Before editing on Desktop HTML editor you have to copy the whole code of your Blogger theme and paste and save as XML file with the name.
But editing on Blogger Editor provides your more advantages.
Example:
- You can see preview your changes on your Blogger but it wouldn’t available on Desktop Editor because of the XML file.
- You can jump to widget easily what is impossible at Desktop Editor.
- After any changes, you can save your theme instantly, what is bored for Desktop Editor.
So in this article, you will learn how to edit Blogger HTML template at Blogger Editor.
Customize or change the design Blog or Website from Browser
STEP-1: Browse your Blog or Website and choose the page you want to customize. I have selected Homepage.
STEP-2: Select the elements (Font, Div, Table, Form, Button etc.) of your Blog and choose Firebug/Inspect Element/Other tools to inspect elements from Right Button Click.
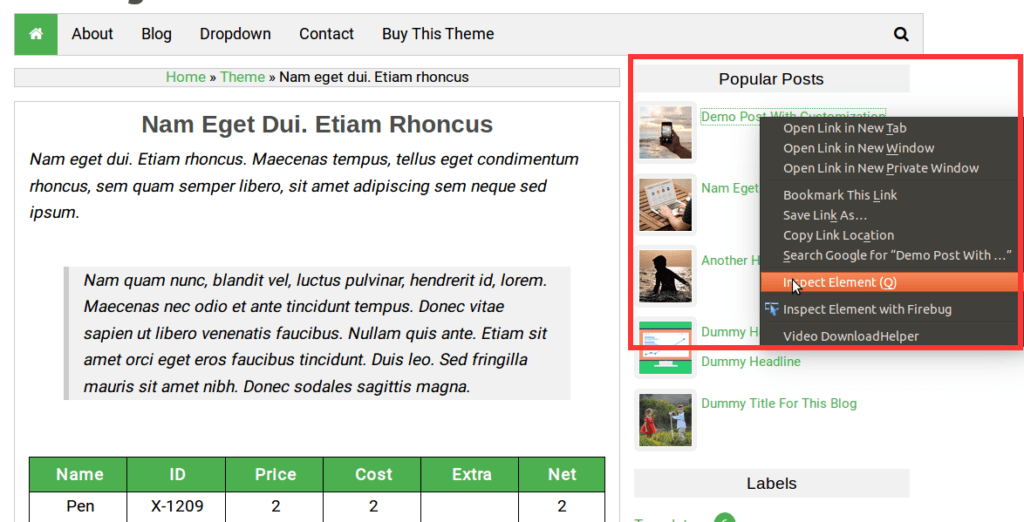
You will see related HTML and CSS code for selected elements.
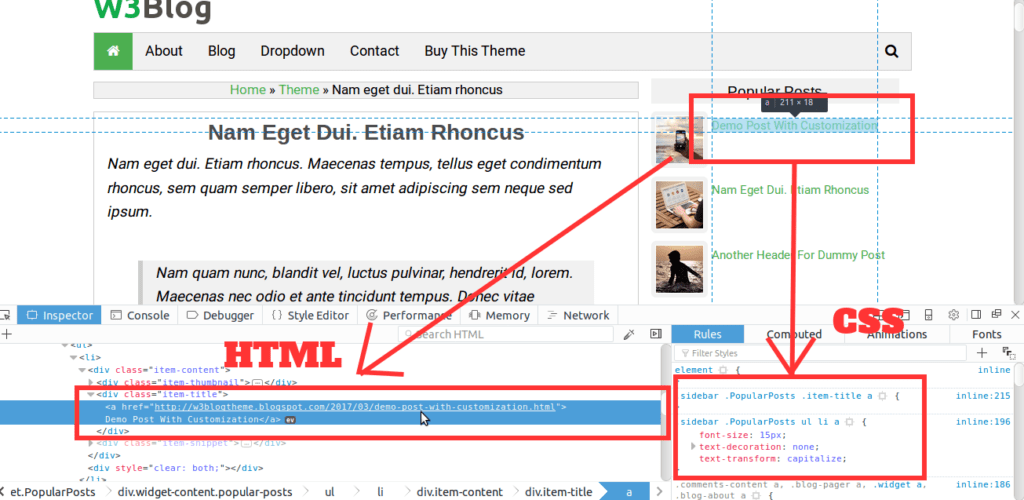
I have selected font and want to change font size. To change the font size, click on the value of font-size and change as you want.
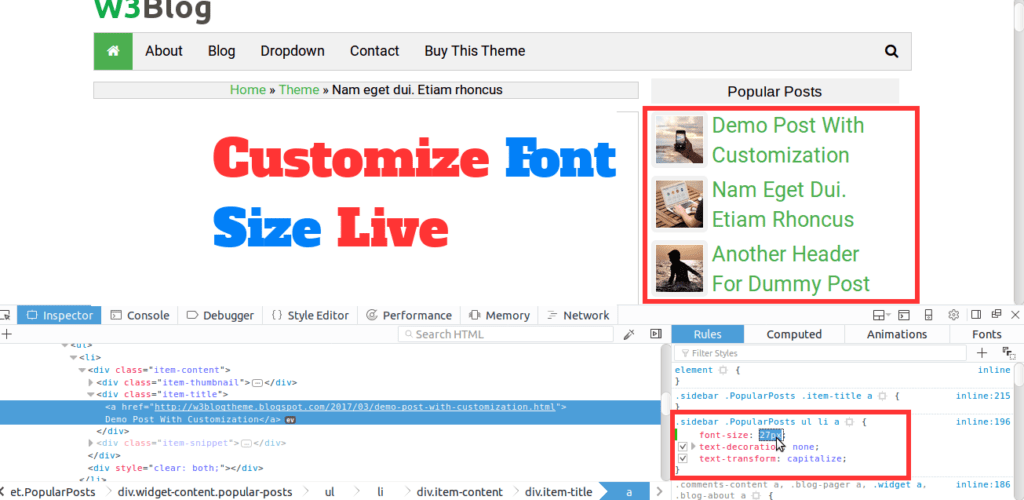
You will see the changes live. Similarly, you can change color, background, width etc. You can also add more CSS after it.
STEP-3: After customizing we have to change on Blogger HTML Codes. Otherwise, it won’t work if we reload this page. So we have to copy the customized or changed CSS to our theme. To do that we have to mainly two works:
- Find the name of ID/Class of customized CSS from Blogger HTML what we have done on Blog.
- Copy the changed CSS and paste to the selected ID/Class on Blogger HTML.
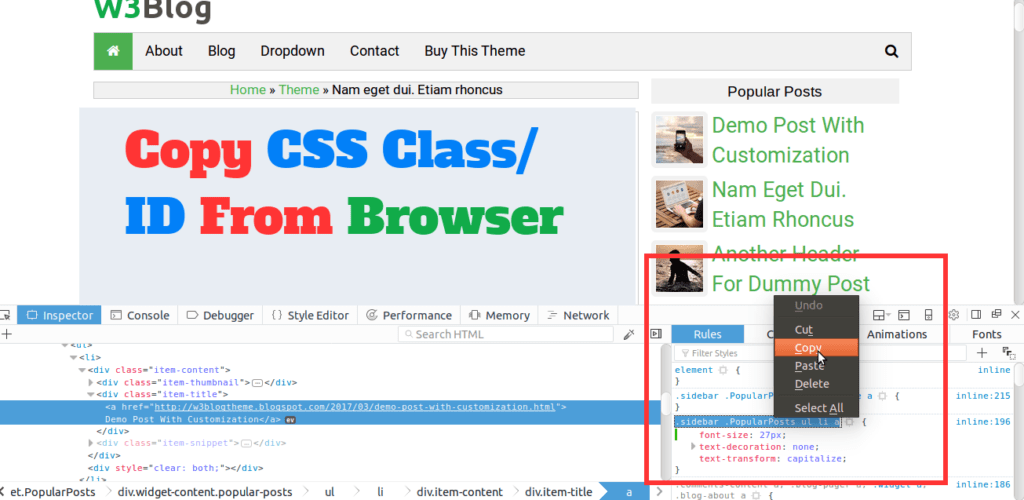
STEP-4: Copy the name of class or id of CSS. To copy click on the class or id as below then copy.
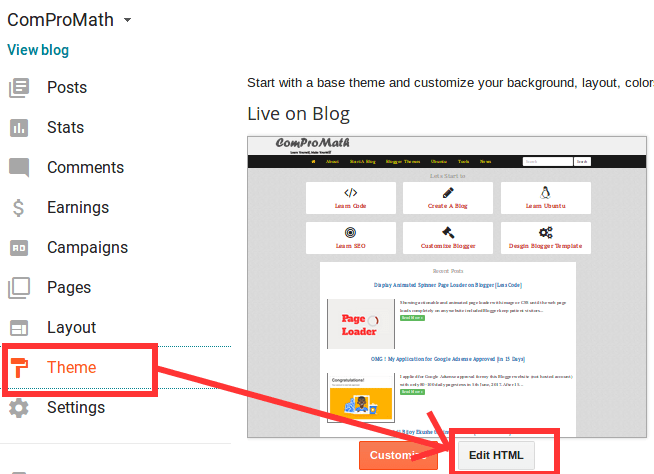
STEP-5: Open new tab from your browser and go to Blogger → Theme → Edit HTML .
And click on codes once to enable edit.
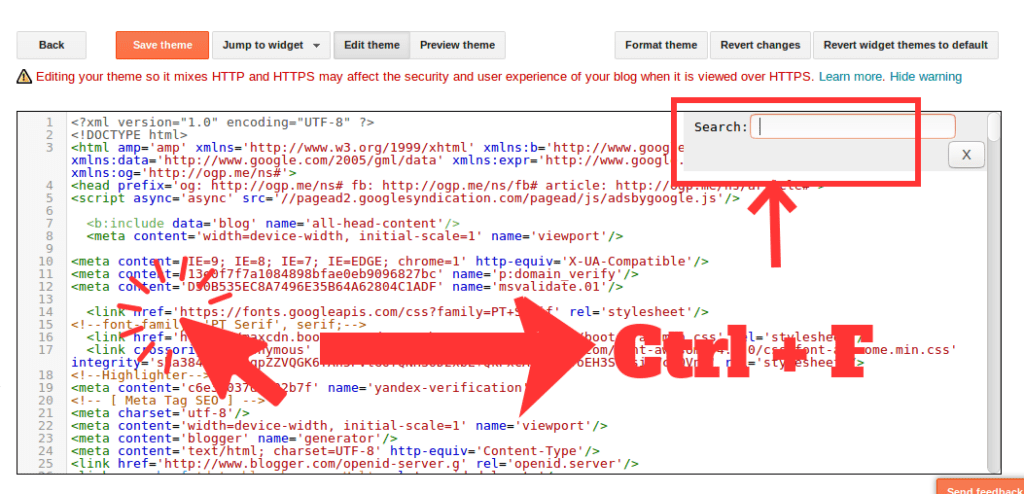
STEP-6: Press Ctrl + F from the keyboard and Ctrl + V. Next hit ENTER. You will find the required CSS to change.
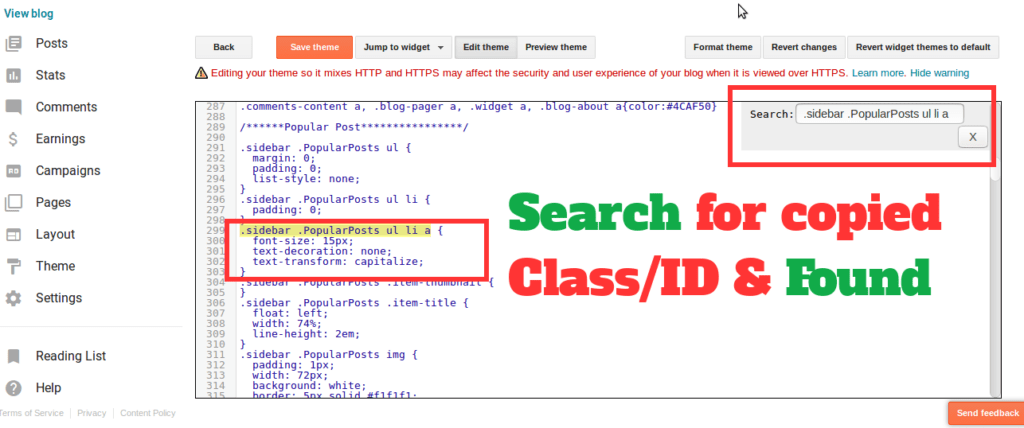
STEP-7: Now go to the previous tab but don’t close the current tab and copy the whole CSS under the name or ID as below.
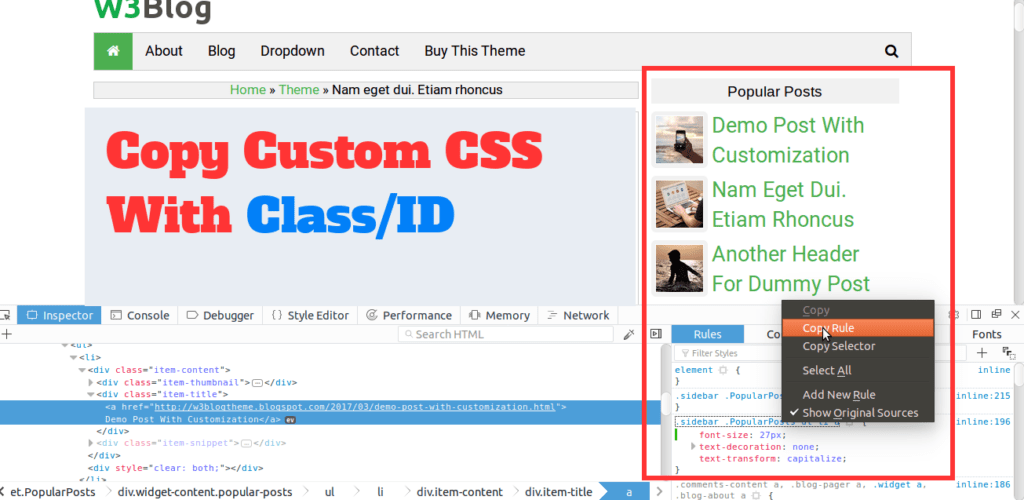
STEP-8: Again go to Blogger tab and select the CSS with your mouse cursor and paste by Ctrl + V on.
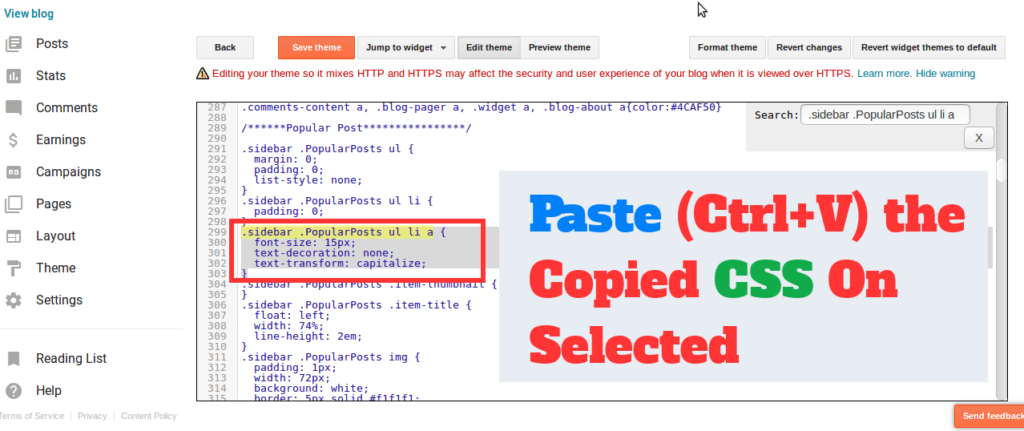
STEP-9: Now save your theme and you can see the preview of changes as below images.
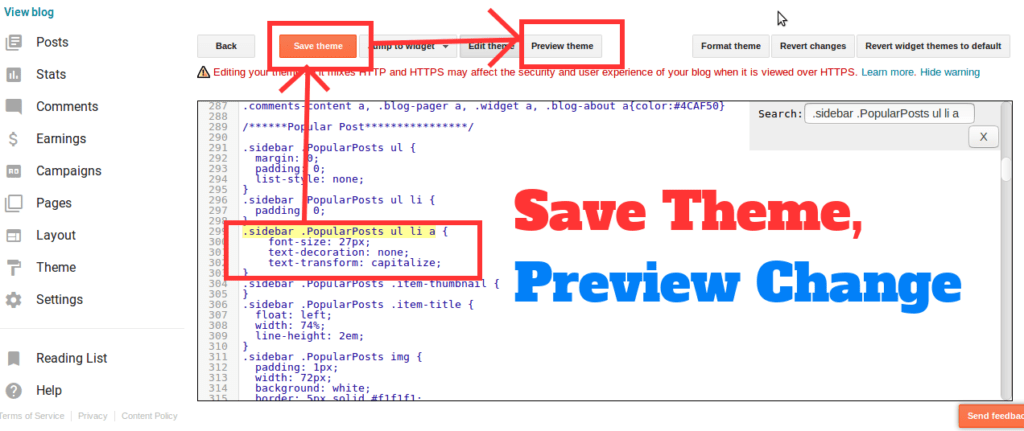
If you click on Preview Theme option, you will preview of your Blog here. But be patient to see.
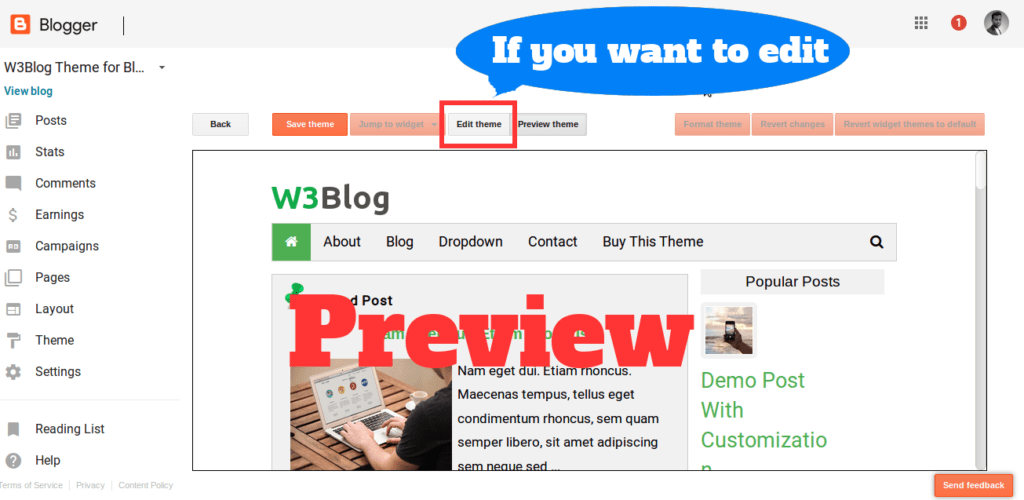
Format Blogger HTML & XML
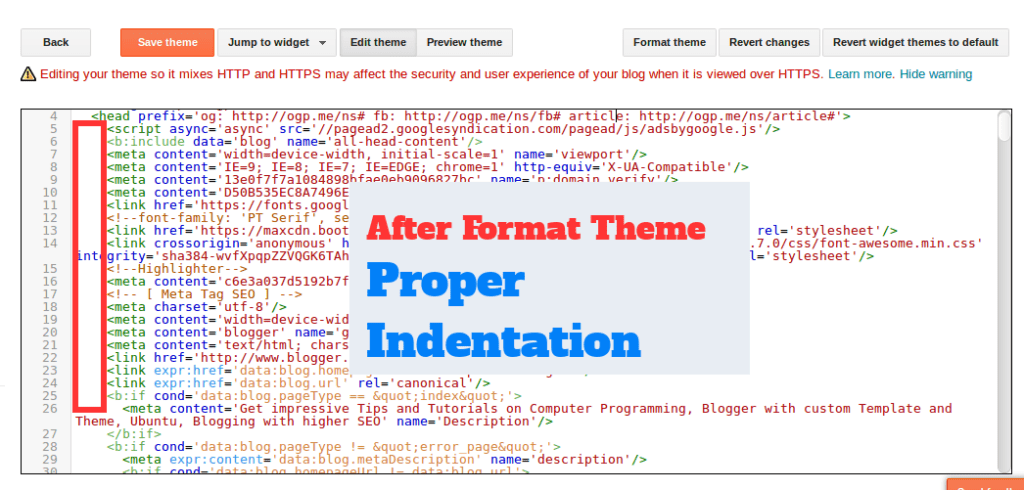
Formatting codes provide good look with the proper indention and help to understand, navigate codes easily. You can format codes within Blogger XML Theme on Blogger HTML Editor now. To do that just follow the below steps.
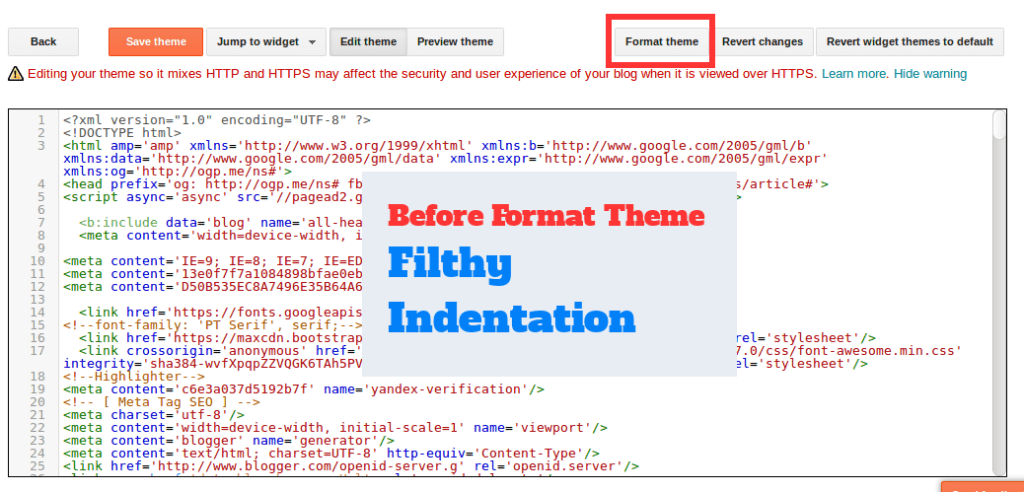
STEP-1: Go to Blogger Dashboard → Theme → Edit HTML
STEP-2: Click on ‘Format Theme’ to format. If you want redo formatting, then ‘Revert Changes’.
I hope you have learned how to edit Blogger template.
Now I recommend you to see the basic and advanced changes, custom design for your Blogger template.
I can confidently say now you will make any change on your Blog or website.
Have got this article helpful or not working? Put your comment below.
# Written by Elliyas Ahmed


